Showing posts with label scale tank. Show all posts

Wednesday, July 23, 2014

A weal of wheels

Progress is really starting to pick up. We'll that is a little disingenuous. I'm spending about the same amount of time each week working on my tin beast; but instead of primarily cutting out stuff, I am instead mostly assembling various components from the stuff that has been already cut out. Gives the appearance of being more productive I suppose. It certainly is more gratifying. I also have two video updates to share. That is mostly caused from just being lazy and not updating my blog. :)

Let's get started with the drive sprockets. As of right now, I am not 100% satisfied with how they have turned out. All of my dissatisfaction revolves around the center cones. Since they are very important to the drive sprocket, I chose to have a machine shop roll them up into their cones shapes as opposed to doing it myself. I had thought that professionals would do a better job than what I am capable of. Unfortunately, I was very much in error. They are neither round nor consistent. It will not effect the drive sprockets while in use, but it does case some cosmetic issues. Once everything is hard welded in you will be hard pressed to find the errors, but it does make getting the cone centered a real pain during the assembly process.


Here are some shots of the drive sprockets getting lined up in the jig I made for assembling them.


Jig is together and welding is about to begin.


The drive sprockets have been tack welded together. I will go through a do the final welds at a later time. Mostly I am letting the idea of dismantling them simmer. I am trying to convince myself that I do not need to tear them apart and cut out/roll up a new set of cones.


Now for the road wheels. After getting the issue with the rims hammered out or rolled to be more accurate, the road wheels went together very easy. As of right now, all have been tacked together and about 3/4's have been completely welded. I started welding the road wheels onto their hubs to start playing around with how best to assemble them.


You can see here the stack of road wheels.


Here are two different angles on a pair that have been welded onto their hub.


Moving forward, over the next few weeks I need to finish the road wheels and get the pairs welded on to their hubs. I also need to hurry up and finish the threads on the axles and spindles. 

Tuesday, December 31, 2013

Counting Rivets

I'm afraid I'm a bit of a tank snob. By that I mean when a tank is used in a movie or such, that it be correct in detail. Some of the more notorious examples are movies like Patton and Battle of the Bulge. Kelly's Heroes and Saving Private Ryan did a better job, but still wrong. Of the major productions, Band of Brothers probably does the best job.

In Patton, none of the vehicles are of period and the Germans are driving around in American M-48 tanks, ironically enough known as the "Patton".


In Battle of the Bulge, again no period vehicle were used. The Germans are again riding around in American equipment with the feared Tiger II being portrayed by a M-47.


Movies started to get better though. The Tiger I tanks used in Kelly's Heroes are mock ups based on Russian T-34s. While it is certainly better than the previous two movies, still not quite there though.


Saving Private Ryan does a much better job with equipment in general and vehicles specifically. Most are of period and authentic. However, at the climax of the movie, the battle "hinges" around two Tiger Is. These are T-34 mock-ups like in Kelly's Heroes. It would be easier to forgive if so much of the action did not pivot around the suspension, road wheels and tracks. Of course, these are the things that look the worst on the mock-ups.


Band of Brothers continued the advancement of the movie industries accurate portrayal of the period. Most equipment and vehicles are authentic. The mock-ups are done well. Their visual weakness are usually obscured with scenery or the action sequences. The Jagdpanther below is a mocked-up Russian T-55. It is fairly well done. Of course, there is no hiding the fact that a T-55 drive sprocket is in the rear while a Jagdpanther's is in the front.


However, there is a silver lining. In the upcoming movie Fury (November 2014), permission was granted by the Bovington Tank Museum to use the only fully operational Tiger I in existence (Tiger #131) in the movie. Hopefully, if they have gone through the trouble of getting Bovington to agree to let them use their tank (they have refused everyone else) in the movie, then that attention to detail will carry over into the rest of the film.


Now what does this have to do with my little Hetzer? Well I wanted you to understand the depth of my snobbery, especially when it comes to the suspension, road wheels and tracks. I anticipate I will spend as much time and effort on these three items as everything else combined.

Sunday, December 29, 2013

Breaking Ground

After many weeks of research and planning, I was itching to start building the bloody thing. The lower hull went together easy enough. The challenge here was learning how to weld. My first attempts were; well, very poor. I am using an inexpensive flux core MIG welder. Not the best out there, but certainly capable of producing decent welds. When my skills get better, I plan on getting a more capable welder. Until that time, the funds have better uses.


Everything went together fairly easy. Welding was easier then I feared it would be. Mind you, the welds look atrocious, but they are strong. During this stage I was spending three times the amount of time cleaning up the welds as I was in actually welding.

With the basic part of the the lower hull frame complete, my plans were to work on the suspension. Welding at ideal angles is challenging enough. Throw in odd angles or upside down and it becomes a real bugger. At this stage the frame can easily be moved, turned or flipped however I need it.

Friday, December 27, 2013

Which widgets?

The final portion of the initial design stage was planning out the power train. There are a number of options, but few are simple. A tank does not turn like a car. A car has the front wheels turn into the the direction you want to go and then the other wheels follow. I have simplified some physics for the sake of brevity. A tank; however, turns by having one of the tracks moving at a different speed then the other. The side that is moving the slowest is the direction of the turn. The greater the difference in the speed of the two tracks, the sharper/faster the turn. Again some simplified physics.

This leads into the question: how to individually control the speed of the tracks? Transmissions in modern tanks are very complicated affairs. They make the transmissions in cars look as simple as wond-up rubber bands. The transmission in your car applies equal power to both drive tires. Without getting bogged down in the exceptions of certain FWD, AWD, limited slip & etc, the general rule of thumb is your car's transmission applies equal power to all drive wheels. If braking force is applied to one wheel, it effects all wheels with power. On a modern tank, the track's speed and direction (forward/reverse) can be individually controlled. The transmissions on earlier tanks were not as capable though. Most were similar to a skid steer transmission, i.e. a Bobcat. Most also had fixed turn radii. Some had as many as 6 to choose from. The driver would select the radius/direction and the tank would turn at a fixed rate in the chosen direction. Obviously, driving took more skill then vs. now.

From a scaled tank perspective, I viewed it as having 3 options. The first was to use an existing skid steer transmission. The challenge there would be to find a used one and within budget. A Borg Warner T-20 is a valid option. This transmission has been used in 6x6's like the Argo and Max. Finding a used one is a little difficult though.


The second option is to make my own. Not as complicated as it might appear on the surface. Of the three options, it is the least expensive, but not substantially so. Obviously, it's not a complicated affair, but does have a higher demand on the fabrication skills. Dave Manson has designed an excellent one he calls the Mantra; a combination skid steer/slip design.


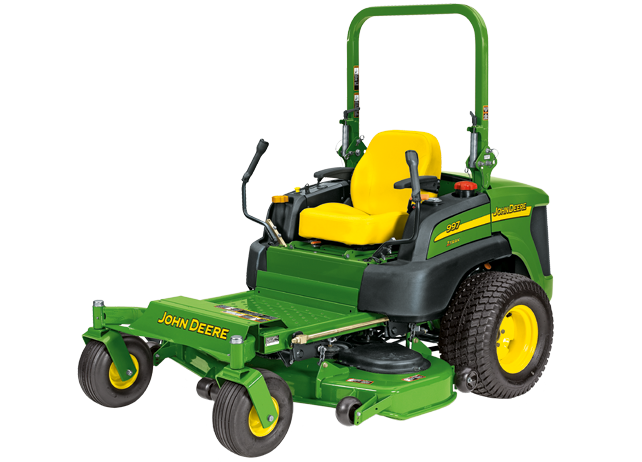
The final option I considered was hydraulic, similar to a zero turn radius lawn mower. Potentially the most expensive of the three options, but only marginally so. The basics of a ZTR (zero turn radius) is the engine powers two variable displacement hydraulic pumps. The hydraulic pumps push the hydraulic fluid through the hydraulic orbital motors causing them to spin. The pumps have very simple controls on them that control the direction and speed that the hydraulic fluid moves. This intern controls the speed and direction of the hydraulic motors which are directly connected to the drive tires. Obviously this is a simplification of the process. Driving a ZTR is very easy. Each pump/drive wheel has a lever. Push it forward, and the wheel spins one way. Pull the lever backwards, the wheel spins in the other direction. The further you push in either direction, the faster the wheel spins. By adjusting the speed that the drive wheels are spinning, you can turn the mower. Just about perfect for a scale tank.


Hydraulics has a  larger range of options as far as being able to control torque, final drive RPM's and greater maneuverability then the others. It also requires significantly less fabrication skills then a Mantra style transmission and marginally less skills then needed for adapting an existing skid steer transmission. Fortunately, I have been able to find a reputable retailer for surplus hydraulics.

Of the three, I like the hydraulic approach the best. If I have priced everything out correctly, it should be the least expensive. This is directly related to finding new surplus that matches my needs. If my fabrication skills were better, then the Mantra style transmission would be the least expensive. Hydraulics will give me better maneuverability then the other two options to include neutral steering. A neutral steer is when the tank spins in place; one track is going forward and the other in reverse. Also, the hydraulics approach does not require a lot of fabrication. While not exactly plug and play, it is the easiest of the three options to install. I still am on the prowl for a T-20 though. I have a used forklift engine that was given to me that would be a perfect match for the T-20. However, for this project I am going to use hydraulics and a 22 hp Kohler engine. 

Sunday, December 22, 2013

CAD

The first hurdle was being able to draw up detailed plans. There are actually two sides to that hurdle. The first part was being able to illustrate what I wanted to build. But even more difficult then that was knowing what was needed...everything form external dimensions, to gauge of steel needed or to the amount bracing required. I collectively refer to all of this as engineering. If I under engineer the project, well obviously it will not function as well as I have envisioned. However, if I over engineer then it adds cost and weight. As the weight goes up, more horsepower and a larger volume hydraulics package is needed to meet the project requirements. Bigger power pack means higher cost and weight.

As mentioned previously, most of the CAD work has been done in SketchUp. It is a little light on some features, but is very quick and easy to learn. Free doesn't hurt either. It's primary focus is architectural design, but it can be used for mechanical design. As for subject material, the major source was a 1:35 scale model. With a pair of digital calipers, I worked out most of the dimensions. There was a couple of websites that also helped with the process: Achtung Panzer, Panzerschreck and PzFahrer.

One of the things that was a fairly big concern for me was accuracy in construction. While it is great to have plans laid out to the most minuet detail, actually building it that way is a different story. However, this is balanced against my desire to make the tank as accurate in detail and scale as possible. So there was a few things that had to be adjusted to allow for my current level of fabrication skills. A good example would be: a 8.015625" (8 and 1/64") long 14 ga 1" square tube with one end cut @ 23° and the other end cut @ 42°. Easy to draw, not so easy to cut to those specifications.

With all of this in my head, I tried not only learn the necessary CAD skills, but also design a tank I could actually build. Most of this was simply rounding up or down. The smallest fraction I used was that which is divisible by 8. Also, when possible I tried to keep angles to multiples of 5 as the gauge on my cut-off saw was only marked in increments of 5°.

Here is a look at some of my first CAD work.


Much of the final details (hatches, exaust vents, vision slits & etc) has yet to be modeled. As I continue learn, both in fabrication and CAD design, how I want to go about fabricating those details continue to evolve and improve.

Monday, December 9, 2013

Achtung Panzer!

Welcome to Armor Werkstatt! This is the maiden post of my very first blog.

 Call me a late bloomer.

The impetus for this blog came from all the interest expressed over my current project: building a 3:5 scale (60%) German Hetzer.  The most common question I get is, of course, why? Unfortunately it is probably the hardest to explain. If you ask a climber why they would want to risk their life climbing a mountain, a common answer is, "because it's there". I have discovered over the years that I have an innate desire to create things. This is coupled with my love of history. Also, I am a life long Tread Head. When I was but wee one, I loved tanks and everything about them. Later, when I was in the Army, I spent 9 years riding around in M1's. So when I am asked "why", I usually respond with "why not" or "doesn't everyone have their own tank?"

The second most common question is, "what are you going to do with it when your done?" To be completely honest, I have no idea what so ever. There are no plans beyond building it. It is something I want to do and I am having a great time doing it. Maybe I will terrorize the neighborhood with it, maybe I will sell it, maybe I will give it to a future grandchild and let them terrorize their parrents with it or maybe I will start playing paintball with it. As of right now, the future is not clear. All I know is I want to build the best looking, working tank I can.

For the uninitiated, this what a German Hetzer looks like....